

Introduction
What is MySQL?
MySQL is one of the world’s most popular open-source relational database management systems. It’s widely used for managing and organizing data efficiently, powering everything from small websites to large-scale applications. At its core, MySQL allows you to store, retrieve, and manipulate data using SQL (Structured Query Language), making data management both powerful and accessible.
History and Evolution of MySQL
Developed in the mid-1990s by Swedish company MySQL AB, MySQL quickly gained popularity for its speed, reliability, and ease of use. Over the years, it has evolved tremendously, especially after being acquired by Oracle Corporation. Today, MySQL continues to innovate, offering features that cater to modern database needs such as replication, partitioning, and advanced optimization techniques. Its continuous development ensures it remains a top choice for developers and businesses worldwide.
Why Learn MySQL?
Whether you’re a developer, data analyst, or IT professional, mastering MySQL opens many doors. Understanding how to write efficient queries and optimize your database can dramatically improve the speed and scalability of your applications. Learning MySQL is not just about handling data—it’s about mastering a skill that’s essential for managing any data-driven project. Plus, the knowledge gained from MySQL translates well to other relational databases, giving you a solid foundation in the world of data.
Overview of Relational Databases and SQL
Relational databases organize data into tables made up of rows and columns, allowing you to model real-world entities and relationships. SQL is the language used to interact with these databases, enabling you to perform tasks like data insertion, querying, updating, and deletion. MySQL’s implementation of SQL is both powerful and intuitive, making it easier to handle complex data operations and optimize your database for performance.
Part 1: MySQL Basics
Chapter 1: Installing and Setting Up MySQL
Before you can start mastering MySQL, the first step is installing and setting up the MySQL server on your machine. Whether you’re using Windows, macOS, or Linux, the installation process is straightforward and sets the foundation for your journey into MySQL optimization and performance tuning.
Installing MySQL on Windows, macOS, and Linux
- Windows:
Head over to the official MySQL website and download the MySQL Installer for Windows. This installer guides you through setting up MySQL Server, MySQL Workbench, and other helpful tools. Once downloaded, run the installer and follow the prompts to complete the installation. - macOS:
On macOS, you can install MySQL using the native installer from the MySQL website or via Homebrew, a popular package manager. For Homebrew, simply open Terminal and run:
Chapter 2: Understanding Databases, Tables, and Schemas
To truly master MySQL, it’s important to understand the core building blocks of any database system: databases, tables, and schemas. These concepts form the foundation of how data is organized, stored, and accessed efficiently.
What is a Database Schema?
A database schema is essentially the blueprint or structure of a database. It defines how data is organized into tables, the relationships between these tables, and the rules governing the data (like constraints and data types). Think of the schema as the architecture plan that ensures your data is stored logically and efficiently.
In MySQL, schemas are synonymous with databases — when you create a new database, you’re also creating its schema. This schema controls the tables, columns, data types, indexes, and other objects within that database.

Creating and Managing Databases
Creating a database in MySQL is straightforward and is the first step before adding any data. You can create a database using the following SQL command:
Chapter 3: Basic SQL Commands
Mastering the basics of SQL commands is essential for anyone looking to master MySQL. These core commands allow you to interact with your databases by retrieving, adding, modifying, and deleting data efficiently. Understanding these commands also lays the groundwork for advanced MySQL optimization and performance tuning.
SELECT, INSERT, UPDATE, DELETE
- SELECT: This command retrieves data from one or more tables. It’s the most commonly used SQL statement.

This query fetches all columns and rows from the users table.
- INSERT: Use this to add new data to a table.
INSERT INTO users (username, email) VALUES ('john_doe', 'john@example.com');
- UPDATE: This modifies existing records.
UPDATE users SET email = 'john.new@example.com' WHERE username = 'john_doe';
- DELETE: Deletes records from a table.
DELETE FROM users WHERE username = 'john_doe';
Filtering Data with WHERE
The WHERE clause allows you to filter records based on specific conditions, helping you retrieve or manipulate only the data you need — a key part of query optimization.
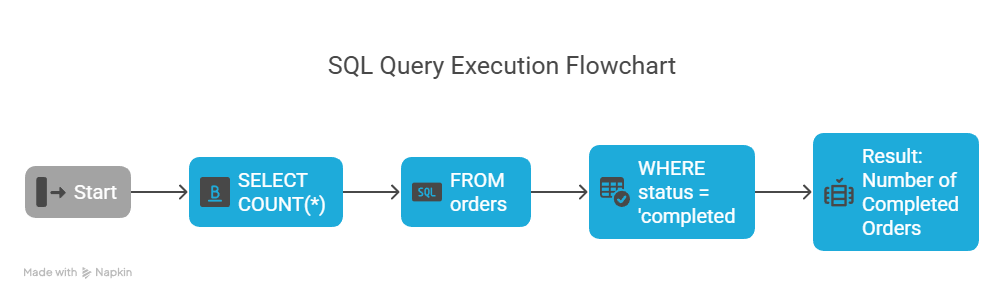
SELECT * FROM orders WHERE status = 'pending';
This retrieves all orders that have a status of ‘pending’.
Sorting Results with ORDER BY
To organize your results, ORDER BY sorts data by one or more columns, either ascending (ASC) or descending (DESC).
SELECT * FROM products ORDER BY price DESC;
This query lists products sorted by price from highest to lowest.
Limiting Output with LIMIT
When dealing with large datasets, it’s useful to restrict the number of returned rows using LIMIT. This improves query performance and speeds up data retrieval.
SELECT * FROM customers LIMIT 10;
This returns only the first 10 customers.
By mastering these basic SQL commands, you build a strong foundation for working efficiently with MySQL. These commands are the building blocks behind more complex queries and the first step towards effective MySQL optimization and indexing strategies.
Chapter 4: Data Types in MySQL
Understanding data types is crucial when mastering MySQL because choosing the right type impacts storage efficiency, query speed, and overall database performance. Proper data typing is a fundamental step in MySQL optimization and performance tuning.
Numeric, String, and Date/Time Data Types
MySQL supports various data types, broadly categorized as:
- Numeric Types:
These includeINT,FLOAT,DOUBLE,DECIMAL, and more, used for storing numbers. For example,INTstores whole numbers, whileDECIMALis useful for precise values like currency. - String Types:
Used for text, MySQL offersCHAR(fixed-length),VARCHAR(variable-length),TEXT, and others. Choosing between these depends on the length and nature of the data you want to store. - Date and Time Types:
MySQL providesDATE,DATETIME,TIMESTAMP, andTIMEto handle dates and times. Using the appropriate type helps in performing time-based queries efficiently.
Choosing Appropriate Data Types
Selecting the right data type is a key part of optimizing your MySQL database. Using overly large data types wastes storage and slows down queries, while too small data types can cause errors or data truncation.
For instance, if you know a column only needs to store ages (which are whole numbers between 0 and ~120), use a small TINYINT instead of a larger INT. Similarly, use VARCHAR for text fields that vary in length instead of fixed-length CHAR to save space.
Understanding NULL and Default Values
- NULL means the absence of a value. Columns can be defined to allow
NULL, meaning data might be missing or unknown. - NOT NULL enforces that a column must always have a value, which is important for data integrity.
You can also assign default values to columns. When a new row is inserted without a value for that column, the default is used automatically.
For example:
CREATE TABLE users (
  id INT PRIMARY KEY,
  username VARCHAR(50) NOT NULL,
  signup_date DATE DEFAULT CURRENT_DATE
);
Here, signup_date will automatically get the current date if none is provided.
Choosing the right data types and understanding NULL and default values sets a strong foundation for your MySQL optimization efforts, helping you create fast, reliable, and scalable databases.
Chapter 5: Constraints and Indexes
To truly master MySQL and optimize your databases, understanding constraints and indexes is essential. These features ensure data integrity, improve query performance, and play a critical role in advanced MySQL optimization and indexing strategies.
Primary Keys and Foreign Keys
- Primary Key:
A primary key uniquely identifies each row in a table. It ensures that no two rows have the same key value, which is crucial for maintaining data integrity. Typically, a primary key is a column likeidthat is unique and not null.
CREATE TABLE users (
  id INT PRIMARY KEY,
  username VARCHAR(50) NOT NULL
);
Foreign Key:
A foreign key creates a relationship between two tables, linking a column in one table to the primary key in another. This enforces referential integrity, ensuring that relationships between tables remain consistent.
CREATE TABLE orders (
  order_id INT PRIMARY KEY,
  user_id INT,
  FOREIGN KEY (user_id) REFERENCES users(id)
);
Unique and NOT NULL Constraints
- Unique Constraint:
Ensures that all values in a column are distinct. For example, a user’s email address should be unique in a users table to avoid duplicates.
ALTER TABLE users ADD UNIQUE (email);
NOT NULL Constraint:
Prevents a column from having NULL values, making sure that the data in that column is always provided.
CREATE TABLE products (
  product_id INT PRIMARY KEY,
  product_name VARCHAR(100) NOT NULL
);
Introduction to Indexes and Their Importance
Indexes are special data structures that speed up data retrieval operations. Think of indexes as the index in a book—they help MySQL find data without scanning the entire table, significantly improving query performance.
- Common types of indexes include B-tree indexes (default), full-text indexes for text search, and spatial indexes for geographic data.
- Proper indexing is a cornerstone of MySQL optimization and performance tuning. However, over-indexing can slow down write operations, so it’s important to choose indexes wisely.
You can create an index with:
CREATE INDEX idx_username ON users(username);
Using indexes effectively can reduce query time from seconds to milliseconds, making your applications faster and more responsive.
Understanding constraints and indexes gives you powerful tools to maintain data accuracy and boost the speed of your MySQL databases — crucial steps toward mastering MySQL and building optimized, high-performance applications.
Part 2: Intermediate MySQL
Chapter 6: Advanced SELECT Queries
To master MySQL beyond the basics, you need to understand advanced techniques for retrieving data efficiently. This chapter dives into powerful query tools like JOINs, subqueries, and aliases that help you write flexible and optimized SQL queries.
JOINs (INNER, LEFT, RIGHT, FULL OUTER)
JOINs are used to combine rows from two or more tables based on a related column, allowing you to retrieve data from multiple tables in a single query.
- INNER JOIN:
Returns only the rows where there is a match in both tables.
SELECT users.username, orders.order_date
FROM users
INNER JOIN orders ON users.id = orders.user_id;
- LEFT JOIN (or LEFT OUTER JOIN):
Returns all rows from the left table and matching rows from the right table. If there’s no match, the result isNULLon the right side. - RIGHT JOIN (or RIGHT OUTER JOIN):
Returns all rows from the right table and matching rows from the left table. If no match, the left side will beNULL. - FULL OUTER JOIN:
Returns rows when there is a match in one of the tables. (Note: MySQL doesn’t natively support FULL OUTER JOIN, but you can simulate it usingUNIONof LEFT and RIGHT JOIN.)
Subqueries and Nested Queries
Subqueries are queries inside another query, allowing you to perform more complex data retrieval operations. They can be used in SELECT, INSERT, UPDATE, or DELETE statements.
Example: Select users who have placed orders:
SELECT username
FROM users
WHERE id IN (SELECT user_id FROM orders);
Subqueries help break down complicated tasks into manageable parts and play a significant role in optimizing queries by filtering data early.
Using Aliases and Expressions
Aliases make your queries easier to read and manage, especially when dealing with multiple tables or complex expressions. Use AS to rename columns or tables temporarily within a query.
SELECT u.username AS user_name, o.order_date AS date
FROM users u
JOIN orders o ON u.id = o.user_id;
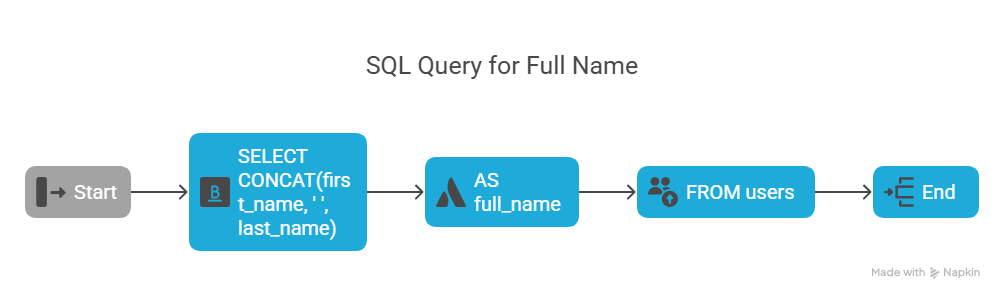
Expressions let you perform calculations or manipulate data directly in your query results, such as concatenating strings or computing totals.
SELECT username, CONCAT(first_name, ' ', last_name) AS full_name FROM users;
Mastering these advanced SELECT query techniques is a crucial step in MySQL optimization. Proper use of JOINs, subqueries, and aliases ensures your queries run efficiently and return the precise data you need, laying the groundwork for deeper performance tuning.
Chapter 7: Functions and Operators
In your journey toward mastering MySQL, understanding built-in functions and operators is essential. These tools let you manipulate data, perform calculations, and filter results efficiently — all critical for MySQL optimization and writing powerful queries.
Aggregate Functions: COUNT, SUM, AVG, MIN, MAX
Aggregate functions perform calculations on multiple rows and return a single value:
- COUNT() — Counts the number of rows that match a condition.
- SUM() — Adds up numeric values.
- AVG() — Calculates the average of values.

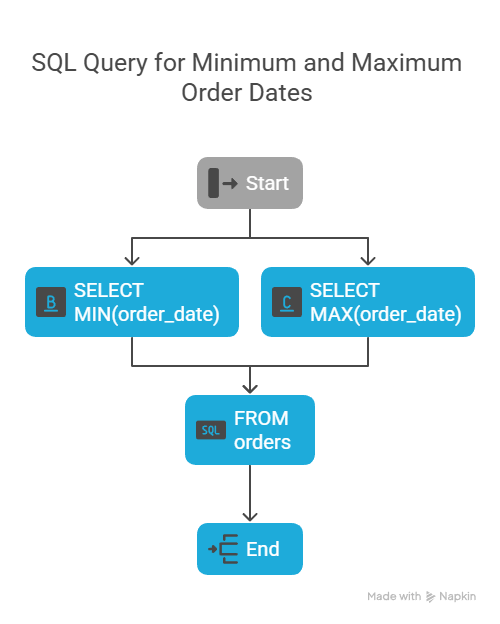
- MIN() and MAX() — Find the smallest or largest value in a column.
These functions help summarize data quickly, which is invaluable for reporting and analysis.
String Functions: CONCAT, SUBSTRING, REPLACE
Manipulating text data is common, and MySQL offers several string functions to help:
- CONCAT() — Joins multiple strings together.
- SUBSTRING() — Extracts a portion of a string.

- REPLACE() — Replaces occurrences of a substring with another string.

Date and Time Functions
Dates and times often need formatting or calculation:

SELECT DATEDIFF('2025-06-30', '2025-05-31') AS days_difference;
These functions are key when filtering data based on dates or generating time-based reports.
Logical and Comparison Operators
Operators help you build conditions and filter results precisely:
- Comparison Operators:
=,<>(not equal),<,>,<=,>= - Logical Operators:
AND,OR,NOT
Example using both:
SELECT * FROM users
WHERE status = 'active' AND signup_date > '2024-01-01';
Mastering these operators allows you to write complex and efficient queries, improving both accuracy and performance.
Chapter 8: Transactions and Concurrency
As you advance in mastering MySQL, understanding how to manage transactions and concurrency is vital. These concepts ensure data integrity and consistency when multiple operations occur simultaneously, playing a key role in MySQL optimization and reliable database performance.
ACID Properties
Transactions in MySQL follow the ACID principles, which guarantee safe and reliable data operations:
- Atomicity: Ensures that all parts of a transaction are completed successfully or none at all.
- Consistency: Ensures the database moves from one valid state to another, preserving data integrity.
- Isolation: Keeps transactions separate from each other until completed, preventing interference.
- Durability: Guarantees that once a transaction is committed, changes are permanent, even after system crashes.
Understanding ACID is fundamental for designing robust applications with MySQL.
START TRANSACTION, COMMIT, ROLLBACK
MySQL lets you manually control transactions with these commands:
- START TRANSACTION: Begins a new transaction block.
- COMMIT: Saves all changes made during the transaction permanently to the database.
- ROLLBACK: Reverts all changes made in the current transaction if an error occurs or if you decide to cancel.
Example:
START TRANSACTION;

UPDATE accounts SET balance = balance - 100 WHERE user_id = 1;
UPDATE accounts SET balance = balance + 100 WHERE user_id = 2;

COMMIT;
If something goes wrong before the COMMIT, you can run ROLLBACK to undo all changes.
Isolation Levels and Locking Mechanisms
Isolation levels control how visible the intermediate states of transactions are to others, impacting concurrency and performance:
- READ UNCOMMITTED: Allows dirty reads (seeing uncommitted changes).
- READ COMMITTED: Prevents dirty reads but allows non-repeatable reads.
- REPEATABLE READ (default in MySQL InnoDB): Ensures consistent reads during a transaction.
- SERIALIZABLE: Highest isolation, transactions are fully isolated, but this can reduce concurrency.
MySQL also uses locking mechanisms like row-level locks and table-level locks to prevent conflicts when multiple transactions access the same data.
Proper understanding and configuration of these settings are crucial for MySQL optimization, ensuring your database is both performant and reliable under heavy workloads.
Chapter 9: Views, Stored Procedures, and Triggers
To truly master MySQL, you need to leverage advanced database features like views, stored procedures, and triggers. These tools help you write reusable code, simplify complex queries, and automate actions, all of which contribute to better MySQL optimization and performance tuning.
Creating and Using Views
A view is a virtual table based on the result of a SQL query. It allows you to simplify complex queries by encapsulating them into a reusable object.
CREATE VIEW active_users AS
SELECT id, username, email
FROM users
WHERE status = 'active';
You can then query the view like a regular table:
SELECT * FROM active_users;
Views improve readability and security by restricting access to specific columns or rows.
Writing Stored Procedures and Functions
Stored procedures and functions are sets of SQL statements stored in the database that you can execute repeatedly, reducing code duplication and improving maintainability.
- Stored Procedure Example:
DELIMITER //
CREATE PROCEDURE GetUserOrders(IN userId INT)
BEGIN
    SELECT * FROM orders WHERE user_id = userId;
END //
DELIMITER ;
Call it with:
CALL GetUserOrders(1);- Functions return a single value and can be used in queries.
CREATE FUNCTION GetTotalOrders(userId INT) RETURNS INT
BEGIN
    DECLARE total INT;
    SELECT COUNT(*) INTO total FROM orders WHERE user_id = userId;
    RETURN total;
END;
Using Triggers for Automated Actions
A trigger automatically executes predefined actions in response to events such as INSERT, UPDATE, or DELETE on a table.
Example: Automatically update a timestamp whenever a record is modified.
CREATE TRIGGER update_timestamp
BEFORE UPDATE ON users
FOR EACH ROW
SET NEW.updated_at = NOW();
Triggers help automate routine tasks and enforce business rules at the database level, reducing application complexity and improving consistency.
Chapter 10: User Management and Security
Mastering MySQL isn’t just about queries and optimization—it also requires strong knowledge of user management and security. Properly managing users and securing your database is critical to protect sensitive data and ensure reliable performance.
Creating Users and Assigning Privileges
MySQL allows you to create individual user accounts and assign specific privileges to control what each user can do. This minimizes risks and follows the principle of least privilege.
Example: Creating a new user and granting read-only access to a database:
CREATE USER 'readonly_user'@'localhost' IDENTIFIED BY 'strong_password';
GRANT SELECT ON my_database.* TO 'readonly_user'@'localhost';
FLUSH PRIVILEGES;
You can grant or revoke privileges like SELECT, INSERT, UPDATE, DELETE, and more, depending on the user’s role.
Password Policies and Authentication
To enhance security, enforce strong password policies. MySQL supports password expiration, complexity requirements, and account locking to prevent unauthorized access.
Example: Setting a password expiration policy:
ALTER USER 'username'@'host' PASSWORD EXPIRE INTERVAL 90 DAY;
Additionally, MySQL supports various authentication plugins, allowing integration with external authentication systems for improved security.
Securing MySQL Databases
Beyond user management, securing the MySQL server involves:
- Disabling remote root login to prevent unauthorized access.
- Using encrypted connections (SSL/TLS) between clients and the server.
- Regularly applying security patches and updates.
- Restricting access by IP address or network.
- Monitoring and auditing user activities.
Proper security configurations protect your database from attacks and data breaches, which is vital for maintaining trust and ensuring smooth operation.
Part 3: Advanced MySQL and Optimization
Chapter 11: Indexing Strategies and Query Optimization
To truly master MySQL, understanding how to use indexes and optimize queries is essential. Proper indexing speeds up data retrieval, while query optimization ensures your database runs efficiently even with large volumes of data.
How Indexes Work Internally
Indexes in MySQL act like the index of a book, allowing the database engine to quickly locate rows without scanning the entire table. Internally, most indexes use B-tree data structures that organize data hierarchically for fast searching.
When a query uses an indexed column, MySQL navigates the B-tree to find matching rows in logarithmic time, significantly speeding up SELECT queries, especially on large datasets.
Types of Indexes
- B-tree Indexes: The default and most commonly used index type in MySQL. Ideal for columns used in equality and range queries.
- Full-Text Indexes: Used for advanced text searching, enabling keyword matching within large text columns.
- Spatial Indexes: Designed for geographic data types, supporting spatial queries like distance or overlap.
Choosing the right index type based on your data and query patterns is critical for MySQL optimization.
Using EXPLAIN to Analyze Queries
The EXPLAIN statement is a powerful tool to analyze how MySQL executes your queries. It shows the query plan, including which indexes are used, join methods, and the estimated number of rows scanned.
Example:
EXPLAIN SELECT * FROM users WHERE username = 'john_doe';
By reviewing EXPLAIN output, you can identify slow parts of your queries and determine if indexes are properly used or missing.
Optimizing Queries for Performance
Beyond indexing, query optimization involves:
- Writing selective WHERE clauses to minimize scanned rows.
- Avoiding
SELECT *by specifying needed columns. - Using JOINs efficiently and only when necessary.
- Limiting result sets with
LIMITto reduce load. - Avoiding complex subqueries that can be rewritten as JOINs.
Regularly reviewing and optimizing your queries is key to maintaining fast and responsive applications, especially as your data grows.
Chapter 12: MySQL Storage Engines
Choosing the right storage engine is a critical part of mastering MySQL and optimizing your database’s performance and reliability. MySQL supports multiple storage engines, each designed for specific use cases and workloads.
Overview of InnoDB, MyISAM, and Others
- InnoDB:
The default storage engine in MySQL, InnoDB supports transactions, foreign keys, and ACID compliance. It uses row-level locking, making it ideal for high-concurrency environments and applications requiring data integrity. - MyISAM:
An older engine known for fast read operations but lacks transaction support and uses table-level locking. It’s suitable for read-heavy workloads with minimal concurrent writes. - Other Engines:
MySQL also offers engines like Memory (for fast, temporary tables stored in RAM), CSV (stores data in CSV files), and Archive (optimized for storing large amounts of historical data).
Differences and Use Cases
| Storage Engine | Transactions | Locking | Foreign Keys | Use Case |
|---|---|---|---|---|
| InnoDB | Yes | Row-level | Yes | OLTP, high concurrency apps |
| MyISAM | No | Table-level | No | Read-heavy, analytics, logging |
| Memory | No | Table-level | No | Temporary data, caching |
| Archive | No | Table-level | No | Archiving large datasets |
Choosing the right engine depends on your application’s needs: transactional safety, read/write balance, or speed.
Configuring Storage Engines
You can specify the storage engine when creating a table:
CREATE TABLE users (
  id INT PRIMARY KEY,
  username VARCHAR(50)
) ENGINE=InnoDB;
To set a default storage engine globally, edit your MySQL configuration (my.cnf or my.ini):
[mysqld]
default-storage-engine=InnoDB
Understanding how storage engines work and when to use them is essential for optimizing MySQL performance and reliability.
Chapter 13: Backup, Restore, and Replication
Ensuring your MySQL database is backed up and recoverable is crucial for data safety and business continuity. In this chapter, we cover essential backup strategies, point-in-time recovery, and how to set up replication to enhance availability and performance.
Backup Strategies and Tools
Regular backups protect your data from accidental loss, corruption, or system failure. MySQL offers several tools:
- mysqldump:
A widely used command-line tool that creates logical backups by exporting databases or tables into SQL scripts.
mysqldump -u root -p my_database > backup.sql
- mysqlpump: A newer, faster utility that supports parallel processing, speeding up backups for large databases.
mysqlpump -u root -p my_database > backup.sql
Choosing the right tool depends on your database size, downtime tolerance, and backup frequency.
Point-in-Time Recovery
Point-in-time recovery lets you restore your database to a specific moment, minimizing data loss during a failure. This requires:
- A full backup (e.g., from mysqldump)
- Binary logs enabled to record all changes after the backup
By replaying binary logs up to the desired time, you can recover exactly what was lost.
Setting Up Replication (Master-Slave, Master-Master)
Replication copies data from one MySQL server (master) to one or more others (slaves), improving availability and load distribution.
- Master-Slave Replication:
Data flows from the master to slaves, which can serve read queries, reducing master load. - Master-Master Replication:
Two or more masters replicate data between each other, enabling high availability and failover.
Basic steps to set up replication:
- Configure the master server to log binary changes.
- Create a replication user.
- Configure the slave server to connect to the master and start replication.
Replication is a powerful feature for scaling and safeguarding your MySQL environment.
Chapter 14: Performance Tuning and Monitoring
Optimizing MySQL for performance and actively monitoring its behavior are vital steps toward mastering MySQL. This chapter covers key configurations, tools, and techniques to help you identify bottlenecks and keep your database running smoothly.
Configuring MySQL for Optimal Performance
MySQL’s performance depends heavily on proper configuration. Key settings to consider include:
- Buffer Pool Size: Controls memory allocated for caching data and indexes (especially important for InnoDB).
- Query Cache: Speeds up repetitive queries by caching results (note: deprecated in latest versions).
- Connection Limits: Set appropriate maximum connections to prevent overload.
Adjusting these parameters in the my.cnf or my.ini file based on your workload can dramatically improve throughput and response times.
Understanding Slow Query Logs
The slow query log records queries that exceed a specified execution time, helping you identify inefficient SQL statements.
To enable:
slow_query_log = 1
slow_query_log_file = /var/log/mysql/slow.log
long_query_time = 2
Reviewing this log regularly allows you to pinpoint and optimize slow queries, a cornerstone of MySQL optimization.
Using performance_schema and sys Schema
- performance_schema:
An advanced monitoring tool built into MySQL that collects detailed statistics about server execution, including query times, waits, and resource usage. - sys schema:
A set of views and procedures built on top ofperformance_schemathat simplifies performance data analysis.
Together, these tools help you dive deep into MySQL internals to diagnose performance issues.
Profiling Queries and Server Metrics
You can profile individual queries to understand their resource consumption and execution steps.
SET profiling = 1;
SELECT * FROM orders WHERE status = 'pending';
SHOW PROFILE FOR QUERY 1;
Additionally, monitoring server metrics such as CPU usage, disk I/O, and network traffic provides insights into system health, helping you balance resources and optimize MySQL performance.
Chapter 15: Scaling MySQL
As your applications grow, scaling your MySQL database becomes critical to maintain performance and availability. This chapter explores different scaling methods and tools that help you manage increasing data and user demands effectively.
Vertical vs Horizontal Scaling
- Vertical Scaling (Scaling Up):
Involves upgrading your existing server’s hardware—such as adding more CPU, RAM, or faster storage. Vertical scaling is simpler but has limits based on the maximum capacity of a single machine. - Horizontal Scaling (Scaling Out):
Adds more servers to distribute the load. This approach increases capacity and fault tolerance but requires careful data distribution and synchronization.
Choosing between vertical and horizontal scaling depends on your application’s needs, budget, and growth projections.
Partitioning and Sharding Basics
- Partitioning:
Divides large tables into smaller, manageable pieces (partitions) within the same server based on key ranges or hashing. Partitioning improves query performance and maintenance. - Sharding:
Distributes data across multiple database servers (shards), each holding a subset of data. Sharding supports massive horizontal scaling but adds complexity in data management.
Both techniques are essential for scaling MySQL databases handling large datasets.
Using Proxy Tools and Load Balancers
To manage traffic across multiple MySQL servers, proxy tools and load balancers are used:
- Proxy Tools (e.g., ProxySQL, MaxScale):
They route queries intelligently, perform failover, and enable read/write splitting for improved performance and reliability. - Load Balancers:
Distribute client connections evenly across servers to prevent overload and ensure high availability.
Implementing these tools helps you achieve scalable, resilient MySQL infrastructures capable of handling growing workloads.
Appendices
Appendix A: MySQL CLI Cheat Sheet
A quick reference for common MySQL command-line interface commands:
- Connect to MySQL:
mysql -u username -p
- Show databases:
SHOW DATABASES;
- Use a database:
USE database_name;
- Show tables:
SHOW TABLES;
- Describe table structure:
DESCRIBE table_name;
- Export database:
mysqldump -u username -p database_name > backup.sqlAppendix B: Common Error Codes and Troubleshooting Tips
- Error 1045 (Access denied): Check username/password and user privileges.
- Error 1064 (Syntax error): Review SQL syntax, especially quotes and commas.
- Error 1146 (Table doesn’t exist): Confirm database and table names are correct.
- Error 1213 (Deadlock): Optimize transactions and consider retry logic.
- General tip: Use MySQL’s error messages and logs to identify and fix issues quickly.
Appendix C: Resources and Further Reading
- Official MySQL Documentation: https://dev.mysql.com/doc/
- MySQL Forums and Community Support
- Online courses on platforms like Coursera, Udemy, and Pluralsight
- Books: “High Performance MySQL” by Baron Schwartz et al.
- Blogs and tutorials from industry experts
Appendix D: Sample Projects and Exercises
Practice makes perfect. Try these projects to reinforce your MySQL skills:
- Build a simple blog database with users, posts, and comments
- Create an inventory system with stock tracking and sales reports
- Implement user authentication with role-based access control
- Optimize queries for a mock e-commerce database
- Set up replication and failover for a demo environment
Conclusion
Mastering MySQL is a journey that combines understanding its core concepts, writing efficient queries, optimizing performance, and securing your data. From installing MySQL and managing schemas to advanced indexing strategies and scaling techniques, each step builds your ability to design and maintain high-performing, reliable databases.
By applying the techniques covered in this guide—especially focusing on MySQL optimization, indexing strategies, and performance tuning—you’ll be well-equipped to handle real-world database challenges with confidence.
Keep practicing, stay curious, and remember that continuous learning is key to becoming a MySQL expert.
Comments